Raw Chocolate Avocado Mousse

Yep, there was a time when I disliked avocado immensely. Weird, mushy, avocado. Can you believe it? Thankfully the times have changed – I can’t get enough of it these days and could happily have it at least once a day on toast. Ahhh nature’s butter. While my favourite is probably on toast with chilli, it is also the perfect side to pretty much every dish ever.

0m4a3576new
This recipe is a tweaked version of one I posted about three years ago, back when I was living/travelling in a van and my photography was embarrassing. So today I bring to you an updated recipe with a little more stylish photos. Avo is still the main player in this dish, though it is hidden by cacao to bring you a rich and creamy dessert. It is quite thick, and I have seen some people do a similar thing but blend a banana into it or extra coconut cream which I suppose would create a lighter texture, I’m yet to try it though.

0m4a3574new

Raw Chocolate Avocado Mousse
(serves 2-3)

2 avocados
1/2 cup cacao
1/4 cup coconut cream
4 Tbsp maple syrup or other sweetener
1 Tbsp coconut oil, liquified
1 tsp vanilla
Pinch of salt

Blend all ingredients in a food processor until smooth. Taste for sweetness and add more sweetener if desired, though keep in mind that the taste does settle overnight – I find the avocado flavour mellows completely with some time. Pour into serving glasses and chill in the fridge over night. Top with desired toppings e.g. berries, coconut, cacao nibs, choc chips, banana.

0m4a3581new

corn2016-1-1024x343

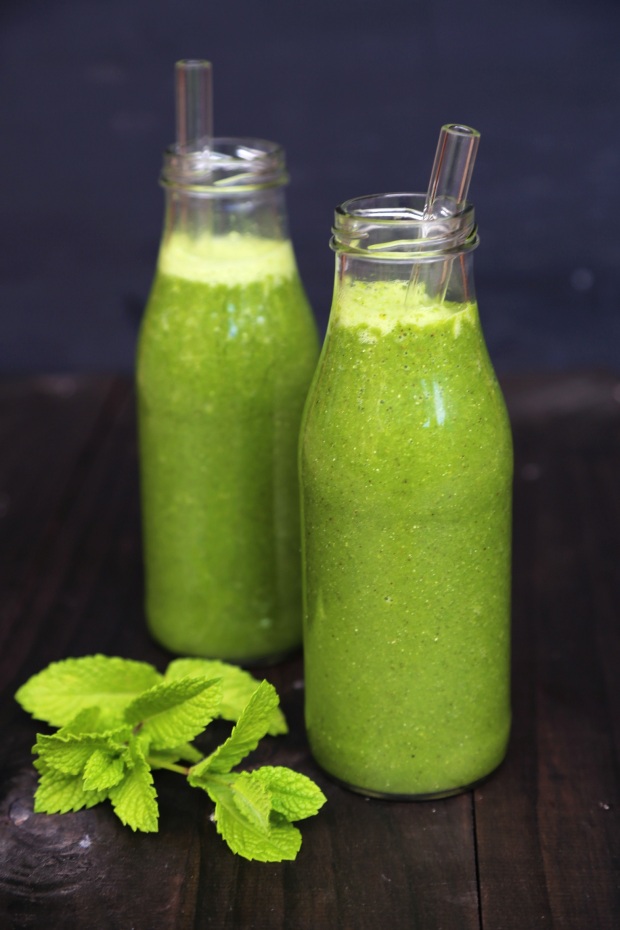
Kiwi Banana Green Smoothie

I had intended to share a delicious creamy green spinach sauce that I often make to put on gnocchi, but I didn’t get around to making and photographing it. Instead, I opted for a fairly quick and easy green option so as not to miss out on today’s prompt – a simple smoothie. The combination of banana and kiwi fruit give a nice balance of sweet and sour, and it’s a nice liquidy one which is refreshing and easy to gulp down. So without further adieu…

0m4a3540new

Kiwi Banana Green Smoothie
(serves 2)

1 banana
3 kiwi fruit
2 cups spinach
6 large fresh mint leaves
1 tsp spirulina (optional)
1 Tbsp hemp seeds (optional)
1 1/2 cups water
Handful of ice

Combine all ingredients in a blender and blend until smooth. Enjoy!

0m4a3544new

corn2016-1-1024x343

Jackfruit Tacos with Charred Corn, Cabbage and Lime Creme

It’s still International week in Vegan MoFo, and I’m popping today’s post under the favourite cuisine theme, although it could probably fit under holiday destination as well as I would certainly love to go to Mexico some day. Yep, I’m using one post to cover two days, ha! I have a few favourite cuisines, but Mexican is definitely up there and I have a particular fondness for tacos.

0m4a3503new1

I was a little late to the party with the savoury jackfruit thing (or even knowing what jackfruit was?!). It started popping up everywhere quite some time ago but I didn’t really have a crack at it until more recently. What was I doing? Think of all the delicious tacos I could have been eating! They are such great warm weather food – just looking at them makes me want to sit outside with a plate full of tacos and a cold beer.

As we make our way towards summer, you’ll know where to find me…

0m4a3488new
Jackfruit Tacos with Charred Corn, Cabbage and Lime Creme
(makes about 10 tacos)

Jackfruit:
1 Tbsp oil
1 medium brown onion, cut into thin moons
2 x 560g cans young jackfruit in brine (NOT syrup)
1 tsp ground cumin
2 tsp smoked paprika
1 tsp dried oregano
1 tsp ground coriander
1/2 – 1tsp ancho chile powder
1 1/2 cups veg stock
2 Tbsp tomato paste
2 tsp liquid smoke
1 Tbsp veg worcestershire sauce

Lime creme:
1/3 cup raw cashews, soaked
1/3 cup soy milk
2 Tbsp fresh lime juice
1/2 tsp garlic powder
1/4 tsp salt
1 tsp pickled jalapenos (optional)

10 tortillas
2 ears corn
2 cups finely sliced red cabbage
1 Tbsp fresh lime juice
1/2 tsp salt

Optional toppings:
Pickled red onions
Fresh coriander
Hot sauce

Start by heating oil in a large pan over medium heat and sauteeing onion until softened. While this is happening, drain your jackfruit and remove any seeds. Slice the large chunks into smaller ones, cutting through the harder core. Some people like to discard the hard bits, but honestly with a bit of cooking they are absolutely fine so why waste that extra taco filling? Add spices and jackfruit and cook a further 2 minutes.

Whisk together stock, tomato paste, liquid smoke and worcestershire sauce and pour over jackfruit. Bring to a boil, then turn down to a simmer for approx 20-25 mins, stirring occasionally, until all liquid is absorbed and fruit is tender and comes apart easily. Use two forks or spatula to tear the jackfruit apart. It’s good to use immediately, but as a side note, I find it recooks really well too.

Meanwhile, grill your corn. You can do this on a grill or barbecue, however I did it quickly over the stove flame. Using metal tongs, hold the corn in the flame until it begins to blacken, turning to cook all sides. Careful as it tends to pop! Allow to cool, then cut kernels off the cob and place in a bowl. Add cabbage, lime juice and salt and mix to combine.

To make the lime creme, place all ingredients in a blender and blend until smooth. If it’s too thick for your liking, add some water one tablespoon at a time.

Assemble tacos! Prepare your tortillas according to packet instructions. Put some jackfruit on each, top with corn/cabbage mix, drizzle over some lime creme and add any optional toppings. Delish!

0m4a3495new

corn2016-1-1024x343


Save

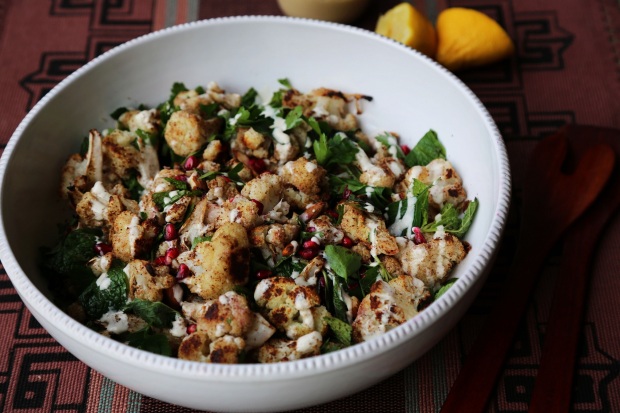
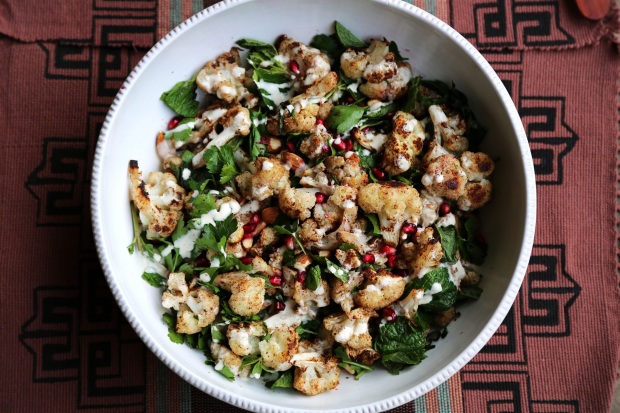
Roasted Cauliflower Salad with Tahini Dressing

I’ve had today’s recipe ready to go for about the last….oh, I don’t know….4 months? Goes to show how much I had been neglecting this poor old blog prior to MoFo. Lucky for me, after signing up to MoFo and starting to panic about how on earth I would actually get some posts together, I realised that I could sneak this recipe in under the International Week theme, with it’s Lebanese flavours. Excellent (cue Mr Burns hands).

0m4a2992new

This salad was actually inspired by one that my Aunty brought along to Christmas lunch one day – I believe it was from one of Ottelenghi’s books (why have I not got my hands on any of these yet?) Prior to this I’d never really given much thought to roasting cauliflower, but now it’s a hot favourite – we have it in salads, tacos, and occasionally even do a marinated and whole roasted cauli as the main meal. Say goodbye to steaming your cauliflower, because roasting gives it a beautiful nutty flavour which is out of this world. Hot damn!

0m4a3004new

Roasted Cauliflower Salad with Tahini Dressing

1 medium-large head of cauliflower
3 Tbsp olive oil
1 Tbsp sumac
1 Tbsp ground cumin
1 tsp ground coriander
1/2 tsp salt
1/4 cup pomegranate seeds
1/2 cup loosely packed mint, roughly chopped
1/2 cup loosely packed flat leaf parsley, roughly chopped
1/3 cup raw or dry roasted almonds, roughly chopped

Dressing:
1/4 cup water
1/4 cup tahini
1/4 cup fresh lemon juice
1 clove garlic, minced
1 tsp maple syrup
Salt and pepper, to taste

Preheat oven to 200C, and line a tray with baking paper.

Cut cauliflower into small florets, and place in a bowl. Pour over olive oil and toss to coat.

In a small bowl, mix together sumac, cumin, coriander and salt. Pour over cauliflower and mix well to coat. Spread cauliflower out over prepared tray and place in oven for 20-25 mins, flipping once halfway. When done, the cauliflower should be slightly browned and have a nutty aroma.

Meanwhile, prepare dressing. Place all ingredients in a blender and blitz until smooth. If too thick, add a little more water, one tablespoon at a time. Taste for seasoning.

When cauliflower is done, remove from oven and transfer to a large bowl. Add herbs, pomegranate and almonds and stir through. Drizzle dressing over and serve immediately – best served when the cauliflower is still warm.

0m4a3005new
tomatotemplate-300x285

Save

Quick and Easy Spicy Noodle Soup

Today’s recipe fits in well with today’s theme of “your easy cook meal”. Last year there was a similar prompt of “quick, easy and delicious” for which I made these zucchini and sweet potato fritters with sumac yoghurt. This time I’m sharing an Asian inspired soup that is (in my opinion) equally quick, easy and delicious.

I always have various ingredients on hand to make a noodle soup of this nature, and it’s great as it’s a really flexible meal. You can easily mix up some of the flavours with different sauces and spices, and use whatever veggies you have – depending on how I’m feeling and what I’ve got I might use broccoli, cabbage, capsicum, spinach or bean sprouts. A squeeze of fresh lime never goes astray either. But the point is, it’s a satisfying meal that can be whipped up fairly quickly and without too much stress.

0m4a3364new
Spicy Noodle Soup

(Serves 2)

2 tsp sesame oil
4 button mushrooms, sliced (approx 1 cup)
3 cloves garlic, minced
1 Tbsp ginger, minced
2 birds eye chillis, minced (or less, according to your taste)
3 cups veggie stock

200g firm tofu, sliced into small rectangles
3 Tbsp soy sauce
1 Tbsp mirin
2 instant noodle cakes (approx 150g)
1 carrot, sliced with julienne peeler
2 small bunches bok choy, ends removed

Optional garnishes:
Spring onion
Fresh coriander
Black sesame seeds
Garlic chilli sauce
Sriracha

Heat 1 teaspoon of the sesame oil in a pan over medium high heat and add tofu. Cook until golden brown on most sides, approx 10 minutes. Turn off heat, and pour 1 tablespoon of the soy sauce over. Set aside.

While this is happening, heat the other teaspoon of sesame oil in a decent sized pot over medium heat. Add mushrooms and saute for approx 1 minute. Add garlic, ginger and chilli and saute for another 30 seconds, being careful not to let them stick. Add vegetable stock, the other 2 tablespoons of soy sauce and mirin, and bring to a boil. Turn down and allow to simmer for 5-10 minutes. Prepare other veggies and garnishes while waiting.

Add noodle cakes and cook according to packet, until tender. Turn off heat and add bok choy to the pot, covering with a lid to allow to steam slightly.

Divide noodles and bok choy between two bowls and pour over liquid. Add tofu, carrot and desired garnishes.

0m4a3375new

broccoli2016-300x300

Save

Save

Almost Raw Lamington Balls

So much for “I’m back!” It’s only taken me another two and a half months to back it up with another post. Ahhh well. Rather than give you a big spiel, I’m going to give you a recipe. Hallelujah!

The Bear and I have never much celebrated Valentines day – perhaps we would have a picnic if it fell on a weekend but there was no going out of our way to make the day particularly special. That was until a few years ago, when we dubbed the day ‘Lamingtons Day’. On this day – February 14th – we make lamingtons in one form or another. Over the years we’ve had lamington cupcakes, a whole lamington cake, lamington ice-cream and of course your stock standard lamingtons. The Bear has one rule – it’s not a real lamington unless it has jam.

rawlamingtons59

This year Lamingtons day kinda snuck up on us, and I had little inspiration for building epic lamington glory. When I say glory, I’m referring to the likes of the Bear’s two (or was it three?) tiered cake that instead of icing, he covered  with three blocks of melted dark chocolate. After it had set, the shell was so thick we had to hack away at it with our biggest kitchen knife to get a piece.

On the auspicious day itself I was also in the process of preparing some food for the working week. I often make variations of bliss balls to take with as a morning/afternoon snack, so with that in mind, I threw together these dudes and I have to say, was pretty pleased with how they turned out.

Before I give you the recipe, I just want to give a shout out to fellow Australian vegan blogger Kyra at Vie de la Vegan. I was doing a quick image search before the photo shoot to get an idea of how I might present the balls (how hard is it to make balls look good?! Eeeep!) In the process, I came across her very own recipe for Raw Lamington Balls as well. Slightly different, but I’m sure equally as delicious. Ch-ch-ch-ch-ch-check it out!

rawlamingtons61

Almost Raw Lamington Balls
(can’t remember how many this makes, eep, will edit after making them again….amateur!)

1 cup raw cashews
1 1/2 cups shredded coconut
3 Tbsp rice bran syrup
1 Tbsp vanilla paste
2 Tbsp non-dairy milk
80g raw chocolate (I used Loving Earth choc-raspberry block)
3/4 cup dessicated coconut

Jam:
1 cup frozen raspberries
1 Tbsp rice bran syrup
1 Tbsp chia seeds

Firstly make the jam – place raspberries and rice bran syrup in a saucepan over medium-low heat. Allow the berries to cook down slowly, gently stirring and squashing them with the back of a spoon every now and then. Cook until berries have broken down, about 5-10 minutes. Take off heat and stir in chia seeds. Set aside.

Place cashews and shredded coconut in a food processor and process until it resembles crumbs. Add rice bran syrup, vanilla and milk and process until mixture comes together and gets a bit sticky. Transfer to a bowl and add chia jam, stir until it is swirled through. Take heaped teaspoons of mixture and roll into balls.

Prepare a tray by lining it with baking paper. Using a double boiler, heat raw chocolate until melted. Pour dessicated coconut out onto a plate. One by one, cover each ball in chocolate before rolling in coconut and setting on the tray to dry. Store in the fridge.

rawlamingtons52

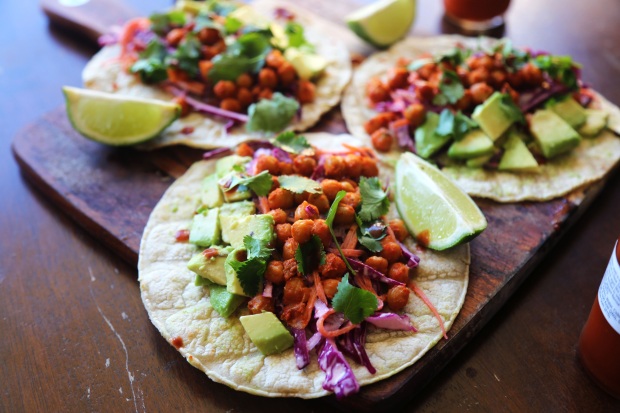
Spicy Chickpea and Coleslaw Tacos

Duuuudes! I can’t believe it’s the last day of MoFo and I didn’t even catch up on my posts! I’m going to be defiant and keep posting my ones that were meant for the last days as they are done and I do want to share them with you. The last week or so I’ve found myself with very little time to post, and even less to read other peoples’ blogs so I do apologise for that, and hope that once MoFo is done I can belatedly catch up on some of the action.

Tacos VS Burritos. Where do you stand on this important issue?

Truth be told, I love them both. But as last MoFo I shared a burrito so this time I thought it was only fair to give tacos some time. I do like tacos because I feel that I can eat more of them in one sitting, whereas I can only stuff one burrito down without feeling like I’m going to puke. Plus they always look so fresh and colourful, and you get to see everything that’s in them straight off the bat.

tacos1

I have to stress to you how easy these are to make. Most of it is down time, waiting for the chickpeas to cook – the rest is just throw it together. My kind of meal. And I’m so excited with the weather being the way it has been – warm nights just screams tacos and beers in evening sun.

tacos3

I am also loving the colour of these – the chickpeas are so vibrant, particularly alongside purple cabbage and some fresh greenery. It’s a rainbow eater’s dream!

tacos2

Spicy Chickpea and Coleslaw Tacos
(makes 10)

10 tortillas
Small bunch of fresh coriander, roughly chopped
Fresh lime wedges for serving
Hot sauce for serving (optional)
2 avocados, diced

Chickpeas
3 cups cooked chickpeas
¼ cup hot sauce (I used Frank’s)
1 tsp onion powder

1 tsp garlic powder
1 tsp smoked paprika
½ tsp ground cumin
½ tsp ground coriander

3 Tbsp olive oil
Pinch of salt

Coleslaw
3½ cups purple cabbage, shredded
2½ cups grated carrot
¼ cup vegan mayonnaise
2 Tbsp fresh lime juice
2 Tbsp water
Salt and pepper

Preheat oven to 220C and line a baking tray with paper.

Place chickpeas in a bowl. Whisk together remaining ingredients for the chickpeas, then pour into the bowl and stir until all combined. Pour out chickpeas onto the tray and spread into a single layer. Cook in the oven for 30 minutes, stirring with a spatula a couple of times along the way.

Meanwhile, prepare the coleslaw. In a small bowl, combine mayo, lime juice, water, salt and pepper. Mix up cabbage and carrot in a large bowl, then pour dressing over it and mix well to combine.

Cook tortillas according to directions – we used white corn tortillas and lightly pan fried them on either side. To assemble, place some chickpeas, coleslaw and avocado on each tortilla, then top with fresh coriander, a squeeze of lime juice and hot sauce.

tacos4

tomatoweb


Pearl Barley Risotto with Mushroom and Spinach

After a bit of a crazy weekend I didn’t get a chance to post the last few days, but had already prepared posts. I’m going to go ahead and share one tonight and hopefully a few tomorrow to catch up, as I’d like to get back on track for the last few days of MoFo.

It’s cold and rainy and there’s a snow drift outside your door! What are you going to make using the ingredients you have?

For a long time, pearl barley was one of those things I would buy and it would sit at the back of the cupboard forever, until that first time I tried it. The nutty, chewiness is what I love, and the reason I think it makes a perfect risotto. We also pretty much always have spinach and mushrooms, as they are boyfriend bear’s favourite breakfast constituents and we seem to have an abundance of lemons always from housemates’ parents or workmates or even the yard down the road that we sometimes sneak into.

barleyrisotto5b
So even though we’re edging away from the cold, snow-at-your-door weather (okay, so we never get snow at the door), this is the perfect thing to cook in that kind of weather. Also great about risotto is that you can pretty much cook it using anything you’ve got on hand – veggies, herbs, spices. It always seems to work out filling, hearty and generally delicious.

Also, I took the ingredients over to my parents’ house to cook and even my dog wanted in on the action –

barley risotto2b

She knows what’s good!

Pearl Barley Risotto with Mushroom and Spinach
(serves 4-6)

1 Tbsp oil
1 brown onion, diced finely
1 leek, sliced
250g mushrooms, sliced
3 cups baby spinach
3 cloves garlic, minced
1½ cups pearl barley
½ cup dry white wine
4 cups hot vegetable stock
2 Tbsp lemon zest
2 Tbsp lemon juice
2 Tbsp nutritional yeast (optional)
¼ cup flat leaf parsley, plus extra for garnish
Salt and pepper

Heat oil in a pot over medium and add onion and leek, cooking for about five minutes until translucent. Add garlic and mushrooms and cook a further couple of minutes. Add pearl barley and cook for a minute, stirring constantly.

Pour in white wine and cook until it has mostly evaporated, a couple of minutes. Now start to add stock, one ladle at a time, and allow to gently simmer until most of the liquid has been absorbed before adding the next ladle full. Continue to cook like this, stirring constantly, until all the stock has been absorbed.

Add lemon zest, juice, parsley, nutritional yeast and spinach and stir to combine. Season with salt and pepper. Serve garnished with extra parsley.

barleyrisotto3b

cornweb

Hazelnut Choc Chip Cookies

I haven’t done much (read: any) experimenting with aquafaba until now, and I wouldn’t even say that this was very experimental, considering the meringue stuff that has been going on (SRSLY!). I did attempt a sponge cake in which I got to whip the aquafaba up and see it form peaks – a pretty amazing sight indeed. The sponge cake itself wasn’t what I had hoped, it was still dense rather than the light and fluffy I was going for. In these cookies, I had hoped the aquafaba would create this mad chewiness, but it didn’t happen to the extent I had intended. I don’t really think the aquafaba is even that necessary here. Regardless, these cookies are damn delicious.

What (insert well known person) would eat if they were vegan.

0M4A0017bb
So who would I be feeding these delicious cookies to, you ask?

cookiemonster
ZOMG! It’s Cookie Monster! Everyone knows Cookie Monster loves a good old choc chip cookie, but the addition of nuts suits his personality down to a T. I only hope he’s brought his cookie eating game cos we are getting pretty damn good and wolfing these babies down.

0M4A0025b

No seriously, blink and you will miss them.

0M4A0037b
Hazelnut Choc Chip Cookies
(makes about 28-32 cookies)

2/3 cup vegan butter
½ cup coconut sugar
¼ cup raw sugar
2 tsp vanilla
3 Tbsp chickpea juice
1 ¾ cups flour
1 ½ ts p baking powder
½ tsp bicarb soda
¾ tsp salt
¾ cup choc chips
½ cup hazelnuts

Preheat oven to 180, line a tray with baking paper. .

In a large bowl, cream together butter and sugars with electric beaters for a good couple of minutes. Add vanilla, chick juice and beat until combined.

In a separate bowl, mix together remaining ingredients except for choc chips and hazelnuts. Add half of the dry ingredients to the wet and stir to combine, before adding the rest along with the choc chips and hazelnuts and stirring to form a dough.

Taking heaps teaspoons, roll into balls then flatten into discs on the tray. Bake for 10-12 mins until bottoms slightly golden (on the shorter side for chewier cookies, longer for crispy). Allow to sit on the tray for a couple of minutes before transferring to a cooling rack.

0M4A0036b
Nom nom nom nom…

broccoliweb

Golden Kraut

Focus on a nutrient.

I may be bending the rules a little on this one – I don’t know if probiotics quite fit into the nutrient category but in terms of beneficial things for your body I definitely think that they are up there. Probiotics are good bacteria that help your body with digestion and nutrient absorption, as well as prevent bad bacteria taking over your system – they are our little buddies that like to help keep everything in balance. I’m sure that’s a very layman’s explanation, but that’s my understanding (also I often picture the little blue dudes from the probiotic ads that battle all the baddies for us).

0M4A0399b

So since I did a couple of fermentation workshops I have been pretty obsessed with fermenting stuff. I haven’t experimented a whole lot, in that I’ve really stuck with the things I know – kim chi, sauerkraut and salsa. I try to remember to have a little bit of fermented goodness every day, often I will treat it as though it’s a salad dressing, packing it in my work lunches.

One thing I have played around with though is variations of sauerkraut. After having a few store bought versions from the health food store, I started scanning the ingredients lists for ideas. One of the ones that I had enjoyed most included carrot and turmeric and was a beautiful vibrant colour. Turmeric is well known for it’s powerful anti-inflammatory properties, so I like to incorporate it into my diet as much as possible.

0M4A0402b

Golden Kraut
(makes 2 large jars)

2 small green cabbages (about 1.5kg)
3 large carrots (about 600g)
1 Tbsp fresh turmeric
2 Tbsp fresh ginger
3 cloves garlic, minced
2 Tbsp sea salt
1½ tsp celery seeds
Pinch of chili (optional)

Sterilise two large glass jars in preparation for the kraut.

Remove outer layers of cabbage and put aside for later. Chop cabbage finely and place in a large bowl. I actually had to use two bowls for this recipe as my bowls were not large enough. Grate carrots and add to bowl. Use a microplane grater to grate turmeric and ginger, and add to bowl, along with garlic, salt, celery seeds and chili (if using).

0M4A0232b

You may want to use gloves for this part as turmeric can leave you with lovely yellow stains on your skin. Using your hands, squeeze and mash the cabbage mix. breaking up the fibres, for a good few minutes. You will notice that the mixture will reduce in size and liquid will start to release from the veggies. When it’s about half the size it started, put a heavy bowl (or a lighter bowl with some heavy items in it) on top of the mixture to weigh it down, allowing more liquid to release from the mix. Leave for 15-30 minutes.

0M4A0236b

Come back and remove the bowl. Pack the cabbage into your prepared jars, making sure to push the mix below the liquid. Leave about an inch of free space at the top of the jar, as the mixture may expand during the fermentation process. It is also important that the cabbage mix remain submerged in the liquid so that mould does not grow on top. If there is not enough liquid, add a little water. Once packed, you can press one of the outer leaves of cabbage into the top of the jar to help keep the kraut submerged. From here, you can either place the lid on top or put a weight on top of the mix (a jar full of liquid, or one of those awesome ceramic weights) with a clean damp towel covering it. Leave out of direct sunlight for 5-7 days, checking each day to ensure the kraut remains submerged (if it is not, just push it back under with a clean utensil). Remove cabbage leaf, transfer to fridge and begin to enjoy! Make sure you always use a clean utensil when dishing out the kraut.

0M4A0405b

broccoliweb